Restorations
Sometimes your precious instrument needs restoration, rather than a straightforward repair. This requires the utmost skill, time and patience. All our luthiers at the Stringed Instrument Company have been thoroughly trained to do this type of work to a very high level.
Perhaps the instrument has had a serious accident and been badly damaged.
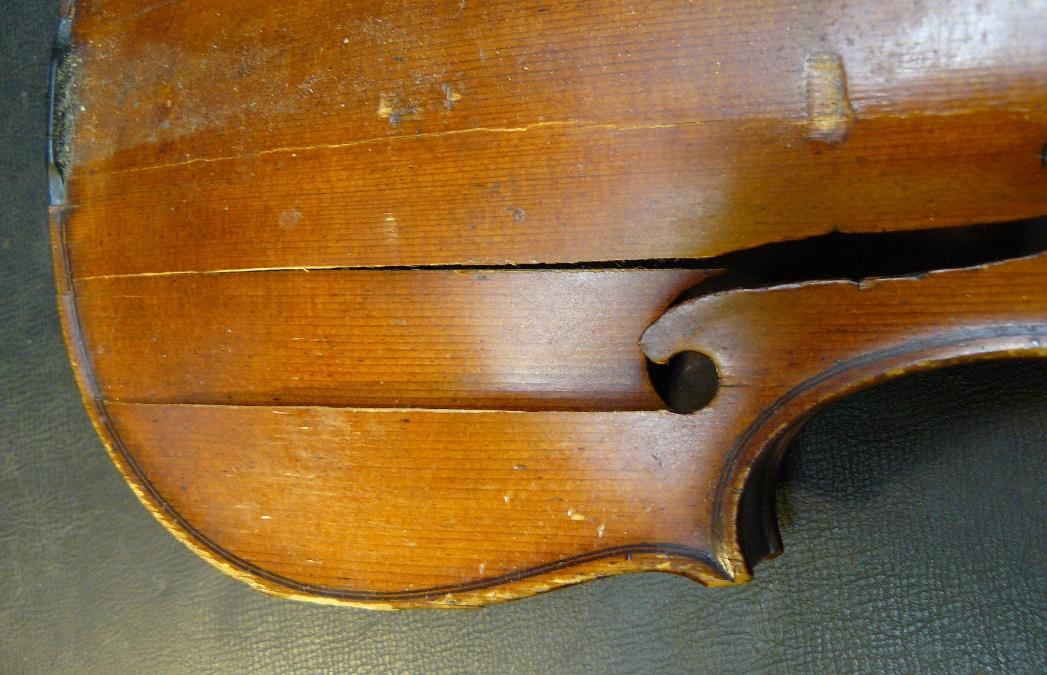
Interestingly, the thin top crack in the photo is the worst, even though the lower two look much more frightening. This top crack runs through the bridge and soundpost area and requires a patch, chalk-fitted from the inside, that goes within 0.5mm of the outside surface.
By doing this, the crack almost ceases to exist, and the strength and tonal power of the belly is preserved.
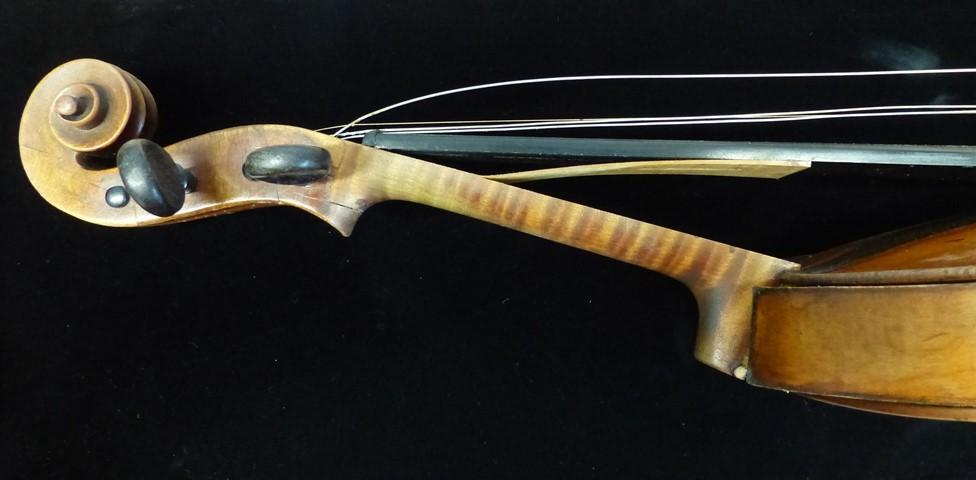
Flood and other water damage can not only weaken the glue that holds the instrument together, but result in major distortion to the ribs, back and belly. In the photo below, you can see how the tension of the strings has pulled this flood damaged violin apart
Sometimes the damage we see isn’t new. It might be that your instrument has been poorly repaired in the past and the repairs have failed.
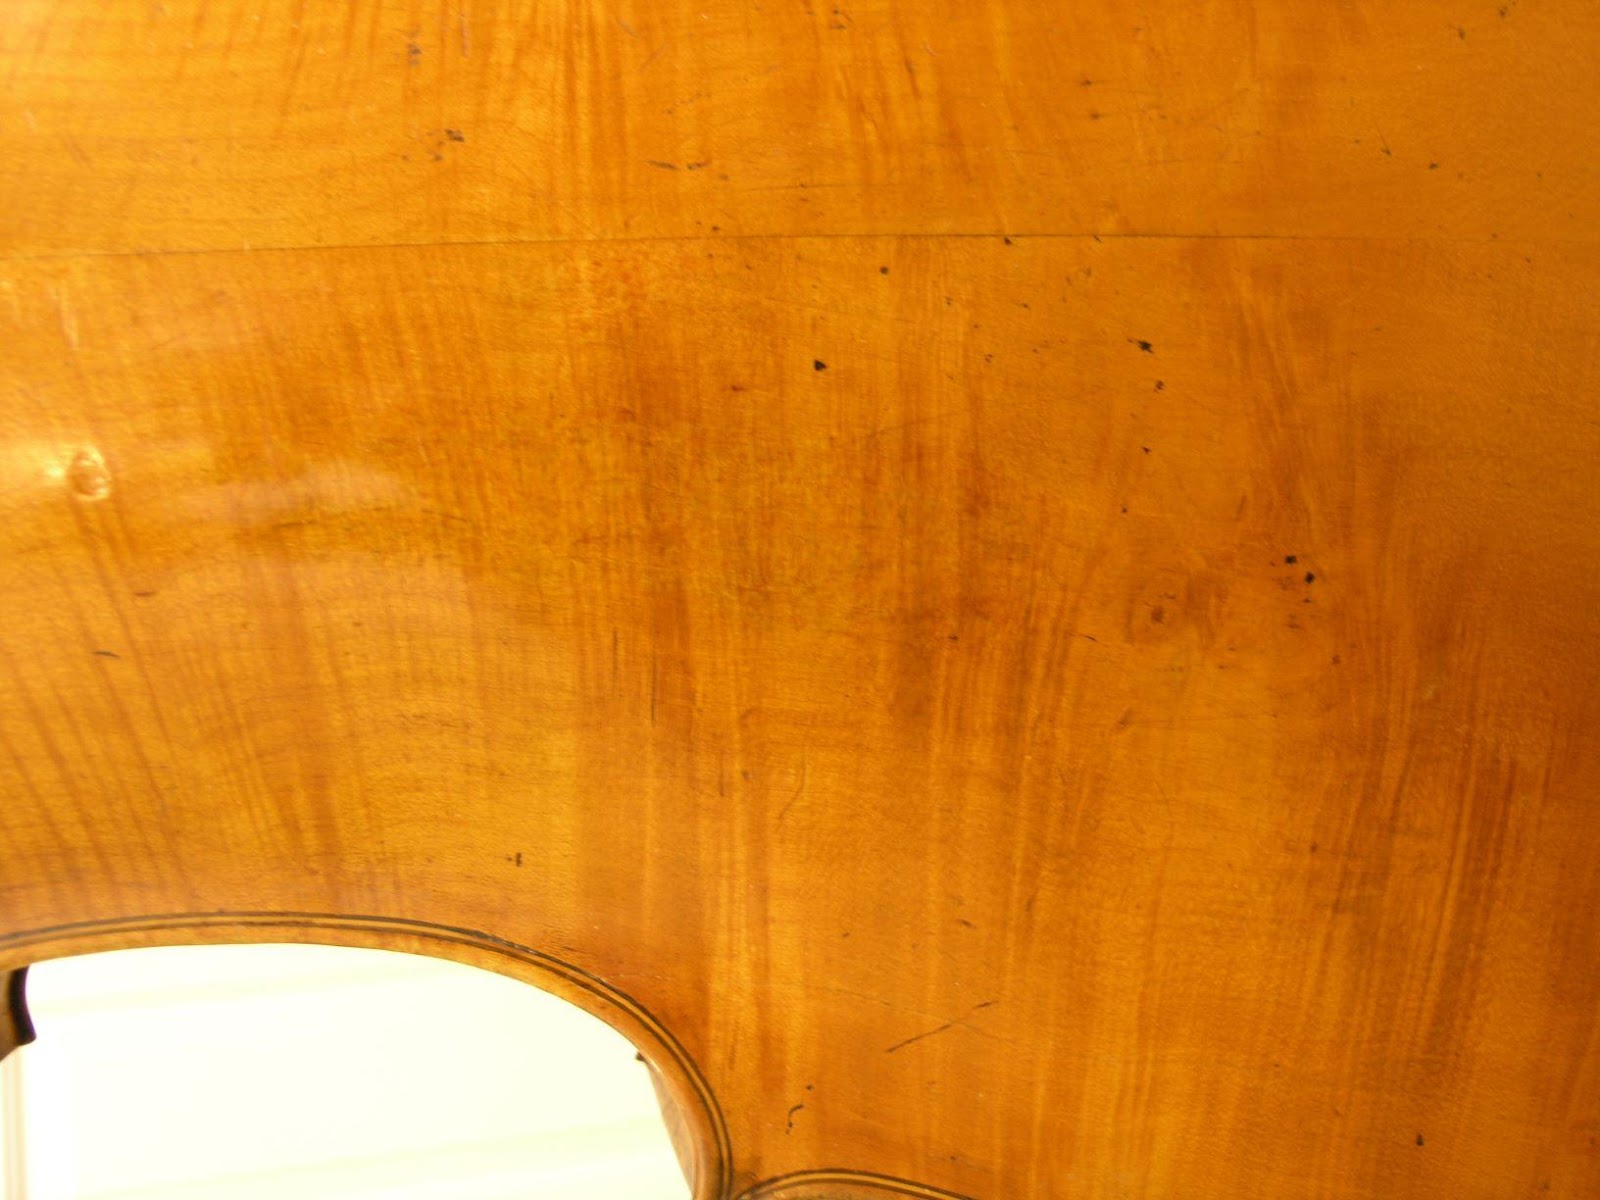
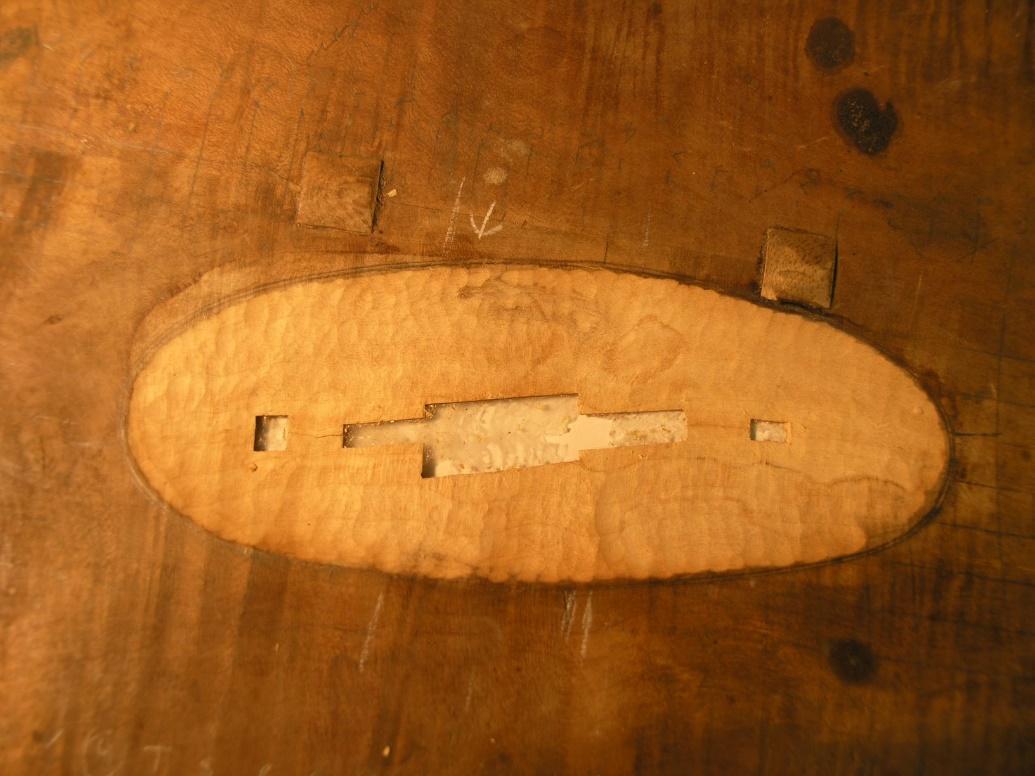
Here’s a photo essay on a complex restoration we were asked to do a few years ago. A lovely old English cello had suffered a soundpost crack in the back – the worst crack you can have. Instead of removing the back and chalk-fitting a patch into the inside, to resist the pressure of the soundpost on the back plate, someone had cut oblong holes in the outside of the back and inlaid little pieces of wood into them.
Not surprisingly, the crack itself, and the joints around the little oblong inlays, had come open.
We had to take the back off, and fit a soundpost patch from the inside – with one major difference! The inlaid wood was unstable and had to go.
Instead of a patch going very nearly to the outside, our patch had to go right through, with the edges of the through-patch bed feathered to nothing…
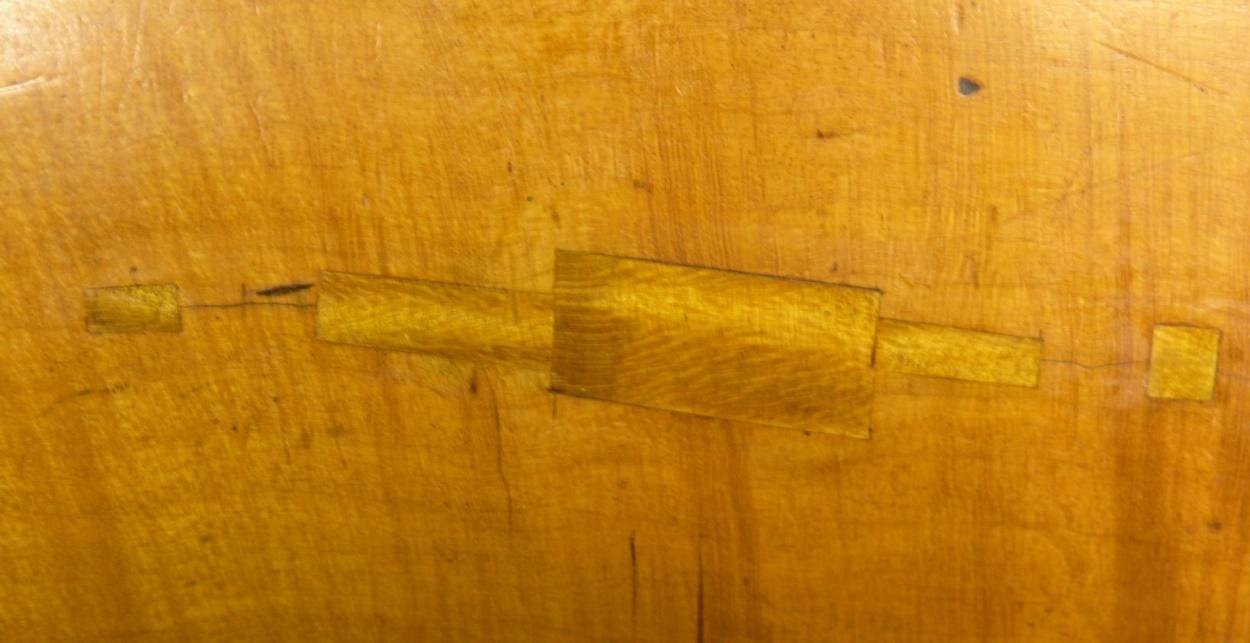
This is a view from the outside. The white wood is the new patch wood…
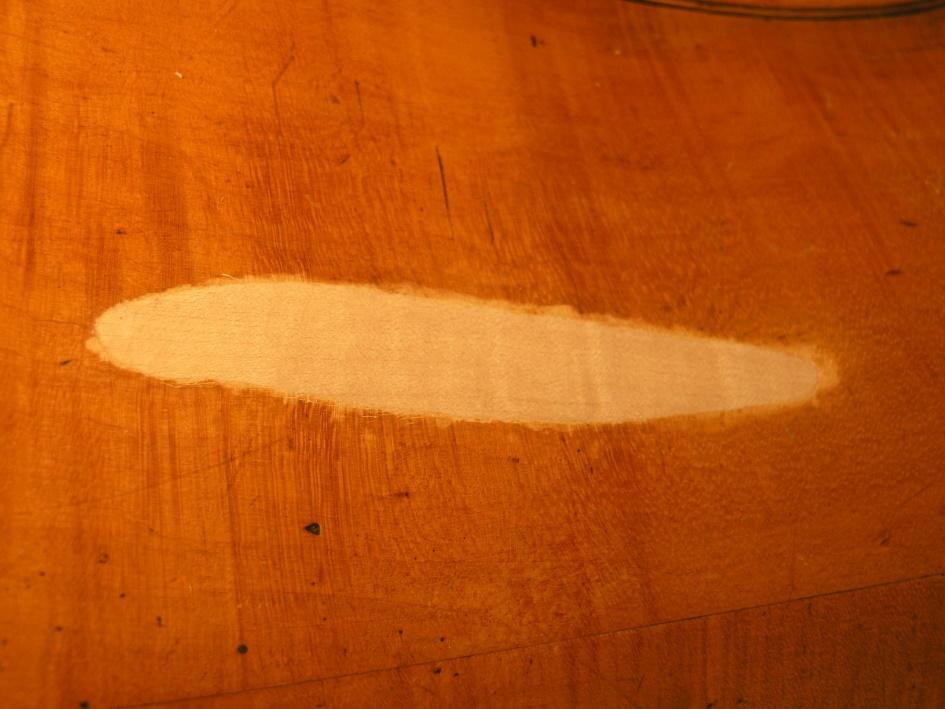
You can see that we worked hard to match the flame pattern of the old wood with the new patch.
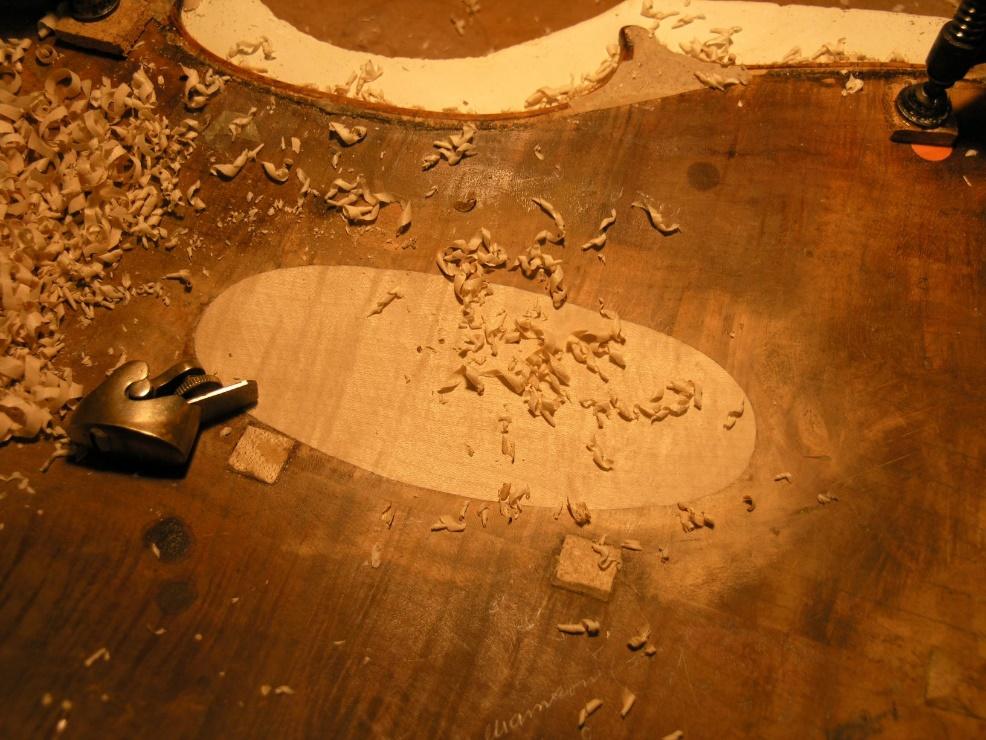
And here’s a photo of the inside of the back, just after we had finished re-thicknessing the new back patch, and before we coloured the new wood to blend in with the old:
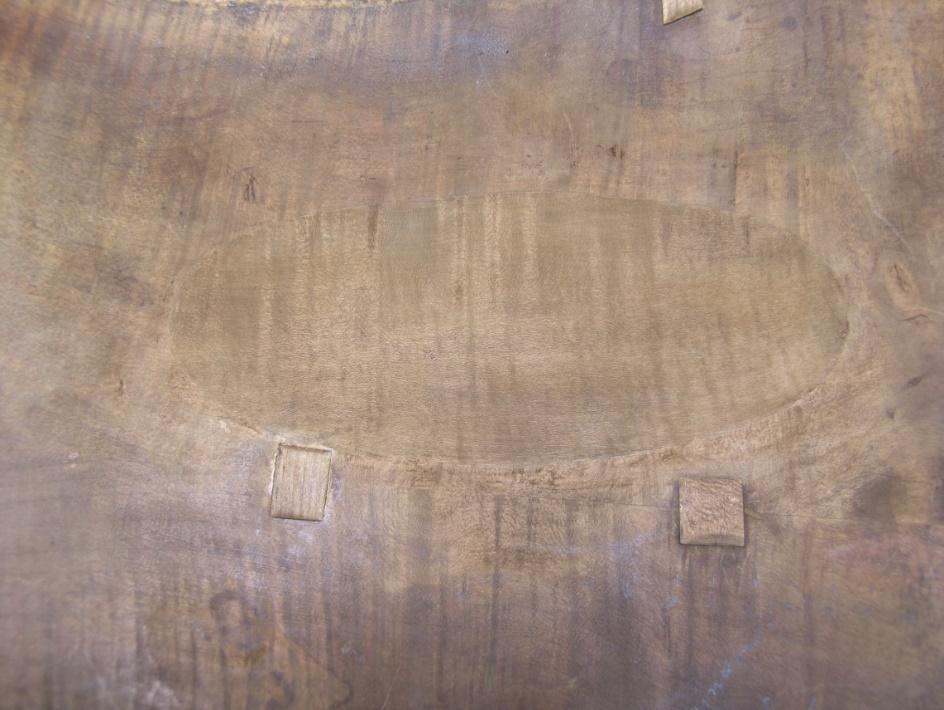
And here is the finished inside surface:
Finally, this is the outside of the back, after the varnish was retouched. This was a particularly scary retouching job - because the original varnish is so pale, there’s nowhere to hide!